If you’re writing nonfiction, you will definitely need a Table of Contents (TOC). If your book is fiction, you may or may not include one.
You can prepare a TOC a couple of ways. While Microsoft Word does offer an automated feature, it can be a bit cumbersome to use if you don’t understand how to add style tags and use them on chapter titles. (I will be making a video on style tags next, and will also then show how to build a TOC this way.)
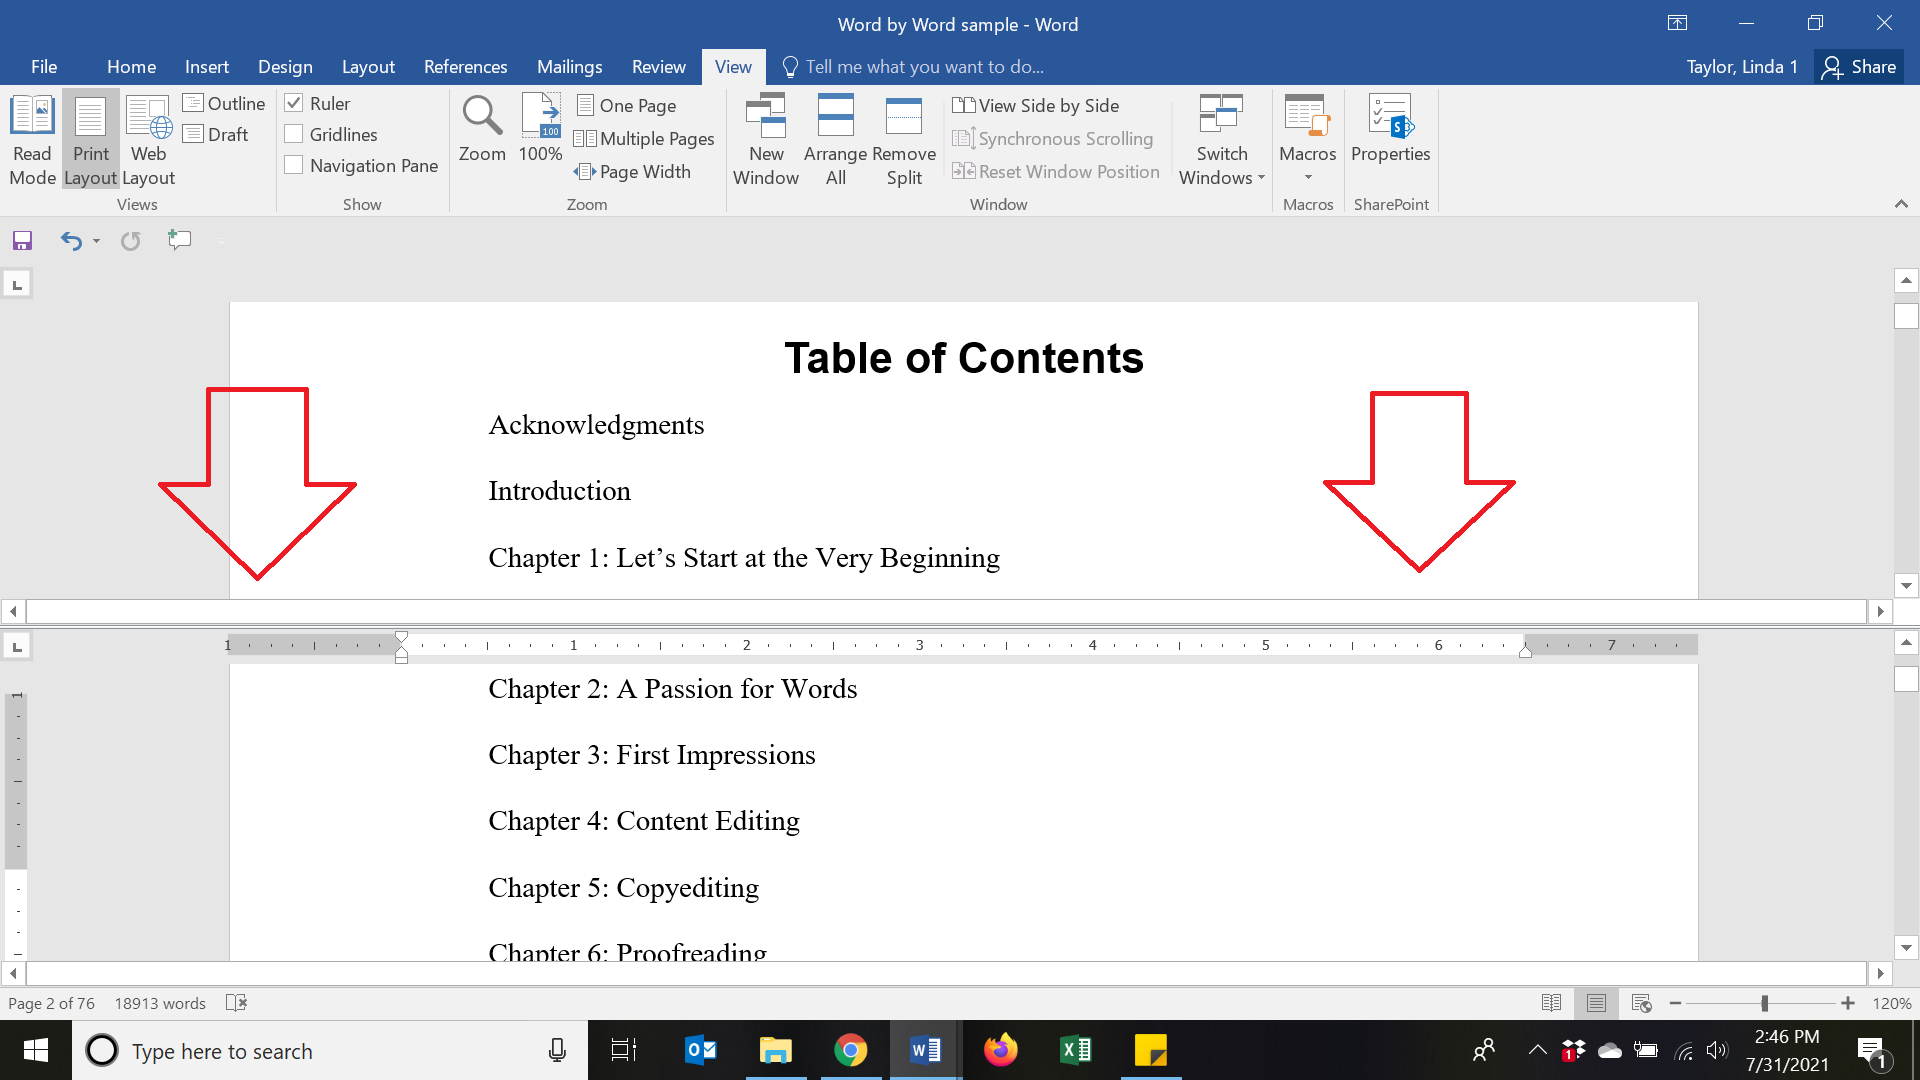
For now, if you want to not be overly tech-y and still get the job done without jumping back and forth in your manuscript, you can make use of the “Split Screen” feature. After the copyright page (or the dedication page if you included one), insert a page break, start at the top line and type “Contents” or “Table of Contents.” Insert a return. Place your cursor where you want to type the next entry that appears in the book (such as Acknowledgements, Introduction, Prologue, or Chapter 1, along with the name of the chapter if it has one).
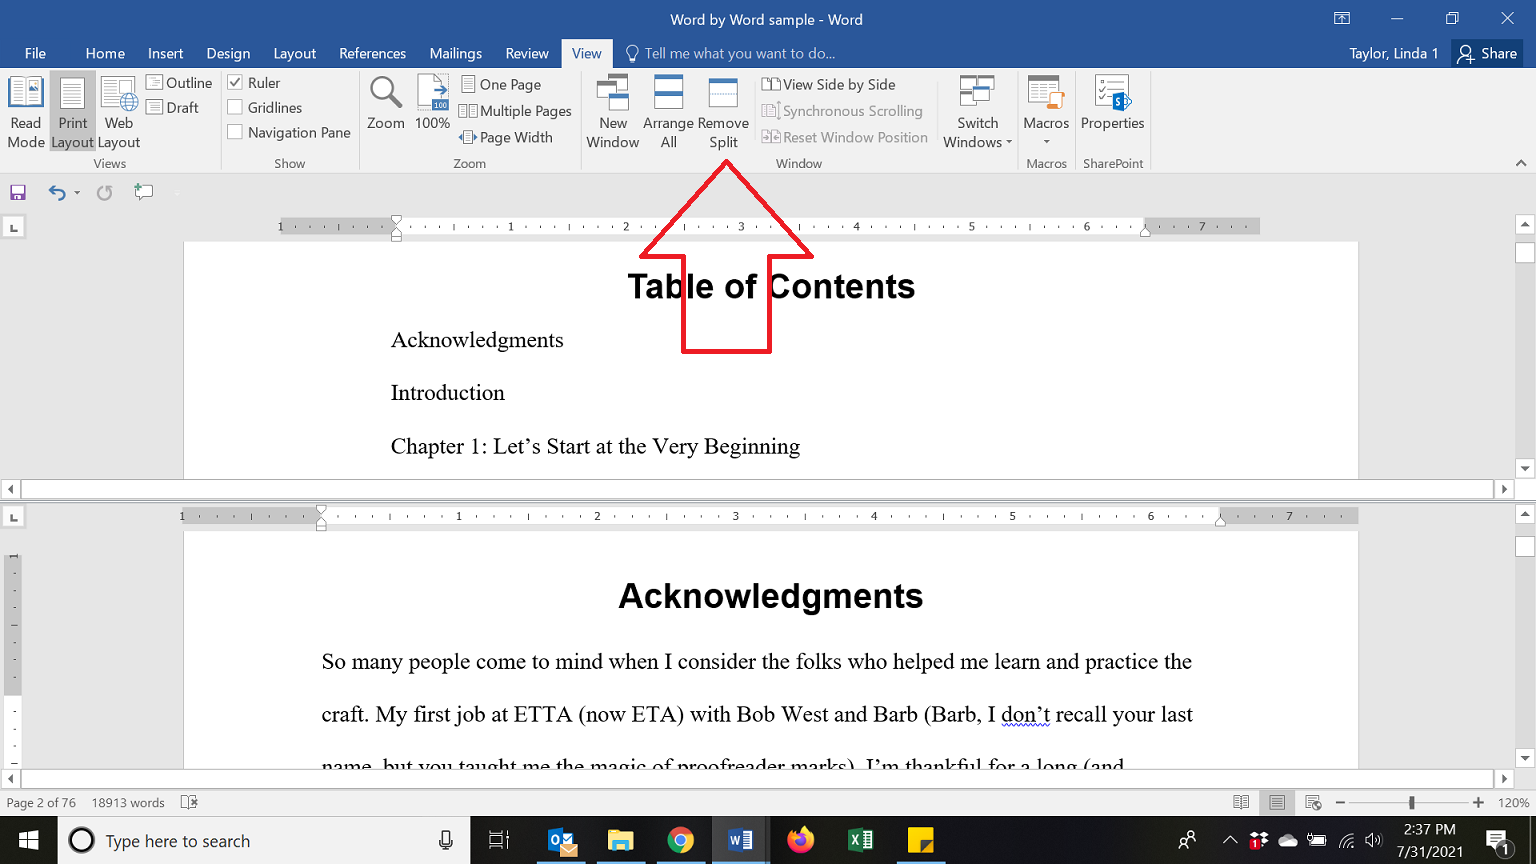
Now you need to split the screen. Navigate to the “View” tab. On that ribbon, you’ll see a button about halfway across that says “Split.” If you click that, a bar will appear that splits your screen.

The split screen allows you to scroll in one part of the screen while leaving the other part in place. Thus, you can keep the TOC page intact to keep typing and adding to while you scroll through your manuscript, stopping at each chapter and including the chapter title. This also helps make sure your TOC matches the actual titles in the manuscript itself. (I can’t begin to tell you how many times these don’t match in books I’ve proofread.)
So keep the top window intact and viewing the TOC page, while you use the bottom window to scroll through the document. Scroll to the start of the first item that should go in your TOC (as I have below, Acknowledgements). Type the title into your TOC. Start the next line in the TOC, and drop to the bottom screen and continue to scroll until you have included all the front matter pieces and all the chapters. Also include any back matter pieces (such as an Index, Bibliography, etc.).
When you’re finished, hit that same button (which now says “Remove Split”), and the split will disappear.
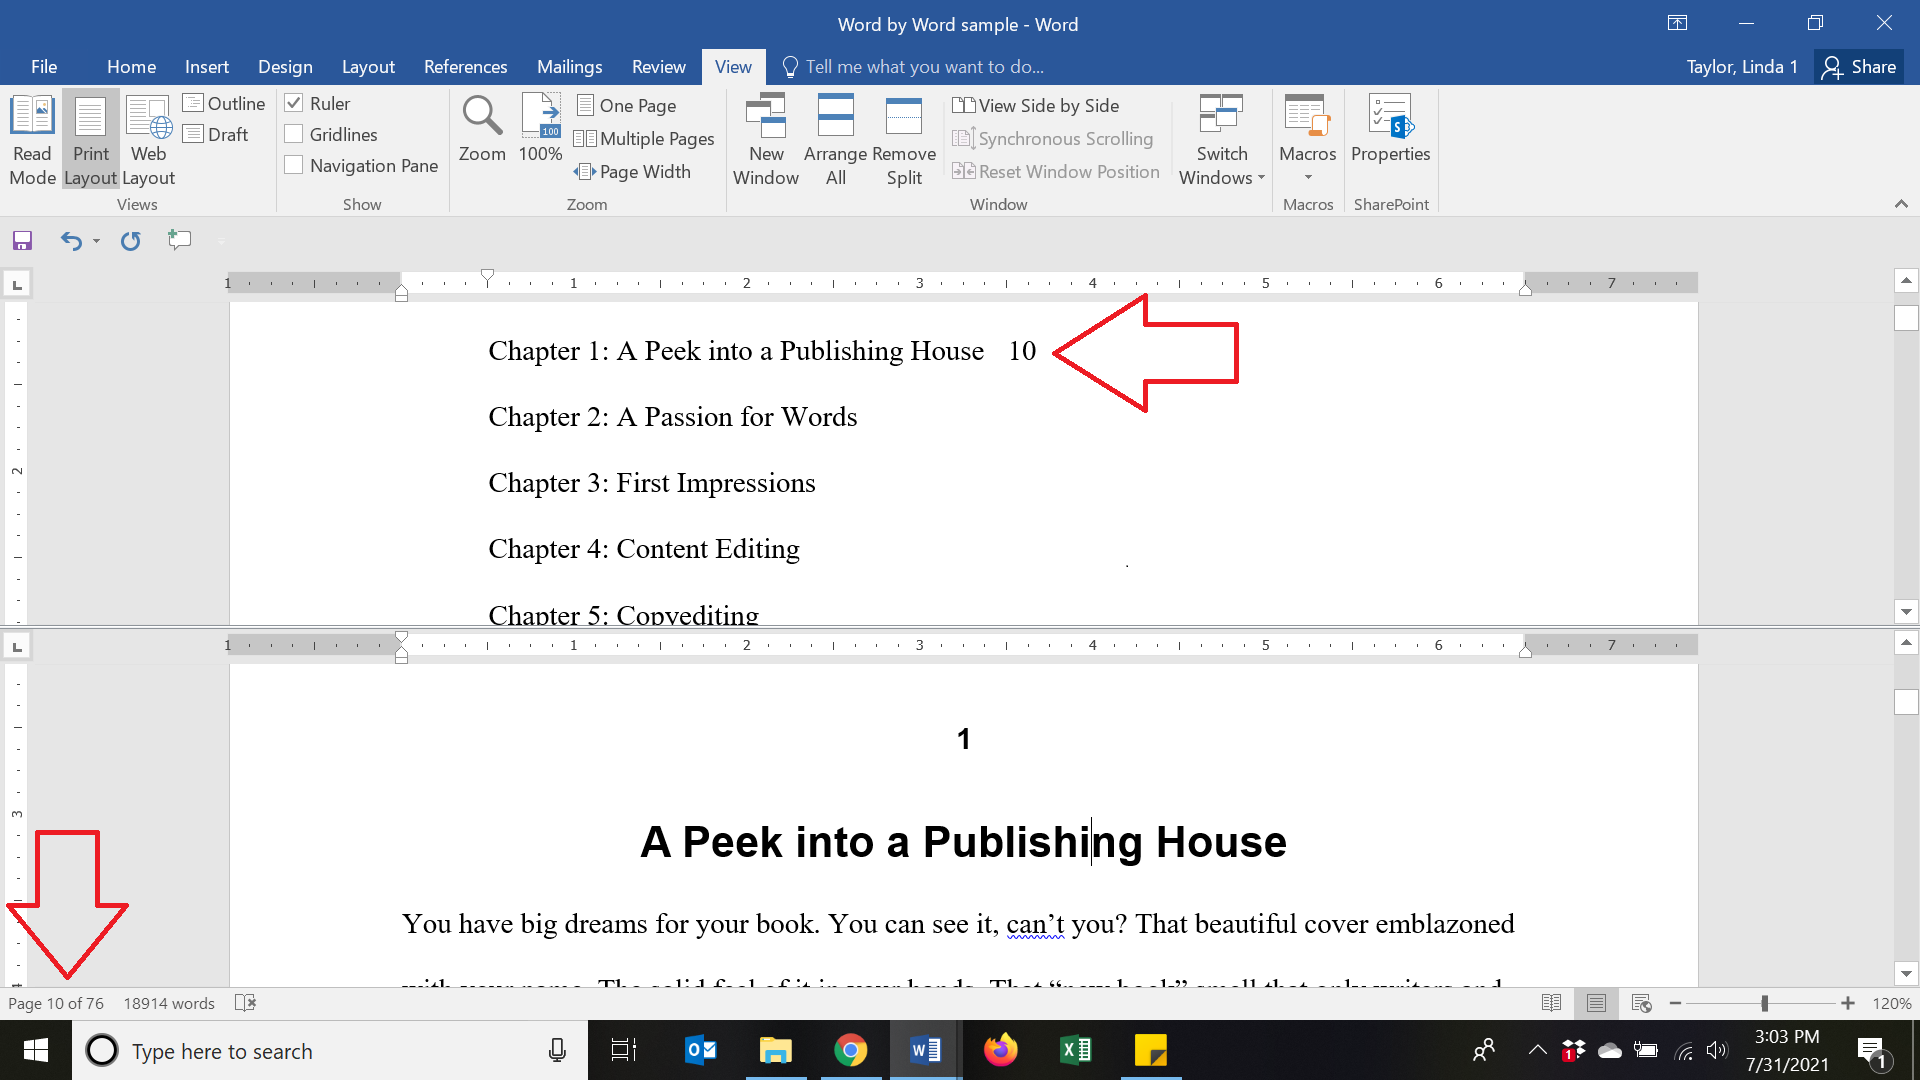
You can include the page numbers from the manuscript in your TOC as you go, or you can include only the chapter titles. (Realize that page numbers really mean nothing because when the book is typeset, the page numbers will need to be readjusted to match the actual book pages.) But if you want your manuscript TOC to reflect the page numbers in the manuscript, just include the numbers from each page right after each TOC entry. Place your cursor in the bottom half of the screen, then read which page number you’re on by looking at the bottom left. This will tell you which page. In the photo below, the bottom half of the screen is page 10, so I put the number 10 in my TOC page beside that chapter name. (You have to be sure that your cursor is in that bottom half of the screen to give you the correct page number.)
There you have it! After your TOC is completed, do another page break before the next page (which would be the first entry in your TOC) and you’re good to go.
Watch next time for an understanding of the various other front matter pieces you can include and the differences among them. And watch for notification of the style tagging video, soon to come!
(This article, without visuals, originally appeared in The Christian Communicator magazine.)

2 thoughts on “Let’s Get Tech-y: Building Your Table of Contents”